


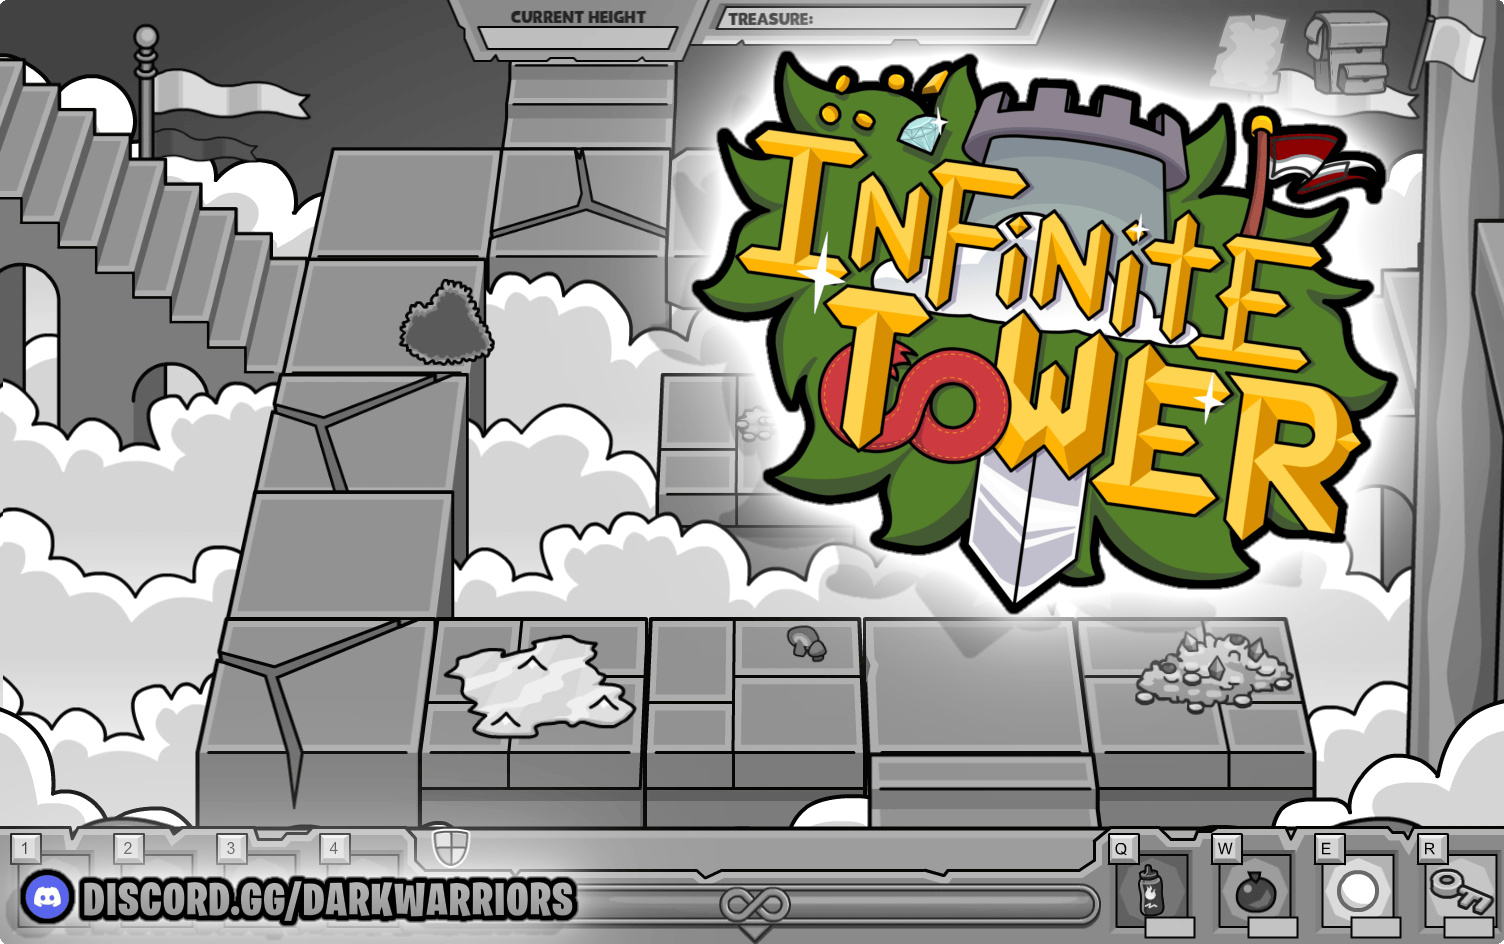
Hey there, Dark Warriors! Ever fancied climbing a mysterious tower full of treasure, traps, elemental spirits and a very grumpy witch? Then Infinite Tower is the game for you! Tucked away in the Coffee Shop, it’s one of the biggest and most unusual challenges on the island. In this Club Penguin Journey Infinite Tower guide, we’ll show you how to play, which artifacts are worth buying, how to survive each room, and how to beat the secret boss, Garianna.
Join the Dark Warriors Community!
Enjoy our Club Penguin Journey codes, catalog secrets, stamp guides and more? Join the Dark Warriors Discord server to stay up to date!
Quick Navigation
The Story of Infinite Tower
Spoiler warning! This is the full story, so skip to How to Play if you’d rather find it out yourself!!
Garianna, the Witch of the Five Kingdoms, has trapped herself inside her own creation, the Infinite Tower. The Jester tells you about her, and then sends you to loot the tower and try to reason with her. As you climb, you’ll solve mazes, beat elemental spirits and buy useful items from the Jester along the way.
Hidden in the tower are secret laboratories, where Garianna once practised her magic. The notes inside them reveal her history. She wanted to reach the cosmos, which is why she built the tower, but she never got any closer. Even though she felt guilty and tired, she kept building higher because of her goal.
Once you’ve collected all ten notes, a mirror in a secret room takes you to a different part of the tower. Garianna accuses you of destroying her tower, and because it’s all she has, she fights back with her magic and runs away. You catch up with her, and she attacks once more.
Garianna then suddenly questions what she’s doing and asks you to meet her at the top. She admits that she locked everyone out and got lost in the tower, and she decides it’s best shared with other penguins. The Jester arrives with a book, so Garianna uses an encasement spell to seal the tower inside it and sends everyone back to Ye Olde Club Penguin.
Club Penguin Journey Infinite Tower Guide: How to Play
Infinite Tower first appeared during the Medieval Party on June 15, 2025, and now has a permanent home in the Book Room, the upstairs room in the Coffee Shop. First, head up the stairs, find the bookshelf, and click the Infinite Tower book on the far left. Then choose Enter thy Tower to begin!


The goal is to climb as high as you can by dodging traps, fighting enemies and collecting treasure. Your score is your height in metres, so each floor adds about 2 to 4 metres. Beat your personal best, but if you’re feeling brave, go after the secret boss at the top!
On the start screen, you’ll also see a bar that tracks your progress towards a special Infinite Tower outfit, so every run counts. You can also click the question mark in the top left corner if you want to see CPJ’s official directions.
Controls and Screen
| What | How It Works |
|---|---|
| Walking and collecting | Click to walk and pick things up. Big piles of treasure take a moment, so stand still on them until they’re fully collected. |
| Artifacts (keys 1-4) | You can carry 4 artifacts in your backpack. Drag each one into a slot, then press its number to use it. Weapons have a cooldown, and right-clicking an artifact shows its stats. |
| Elemental throws (Q, W, E) | Throw hot sauce, water balloons and snowballs at enemies. You start with 2 of each, but you can hold up to 10 of each. If you have fewer than 2 of one type, you’ll get 1 back after about 6 seconds, until you’re back up to 2. |
| Keys (R) | Stand on an artifact chest, then press R to unlock it. You can hold up to 4 keys, but you start with none. |
| Health and shields | You start with 1 shield and full health. Hits take away shields first, then health. Shields also come back when you finish a floor. |
| Top bar | Shows your height, your treasure, your notes (out of 10), your backpack and the surrender flag. |
Your First Room
Every climb begins in a starting room, so you’ll find a key, an artifact chest and three exits there. It always looks the same, too. Grab the key, open the chest with R and drag your first artifact into a slot. Careful here, because dropping an artifact onto a full slot replaces the old one and you’ll lose it!

If you rejoin the tower, you can choose Start from the bottom. However, if you don’t, you’ll spawn on a random floor below your best height. Either way, you’ll still always begin a climb without any items.
Room Types
Every floor has a different type of room, and you can’t go back once you leave one. A room can have several exits and any of them will do, but you can’t take stairs that lead downwards. Here’s what you’ll run into:
| Room | What To Expect |
|---|---|
| Maze Room | Walls, spikes, moving obstacles and trapdoors. If a trapdoor opens under you, you fall 10 metres, which is about two floors. There’s treasure to collect, but fighting the enemies in here gives you no reward. |
| Battle Room | Elemental spirits to defeat. They always drop a key and an artifact chest, and a cracked floor is a good sign that beating the enemies will make them appear. You still don’t need to beat every enemy to move on. |
| Outdoor Room | Outside the tower, with ice spikes, spinning fire bars and bouncing water orbs. There’s treasure, keys and chests here, but no enemy rewards. Secret rooms never appear outdoors. |
| Secret Room | A hidden room with no enemies. It holds one of the 10 notes and also a free artifact chest that doesn’t need a key. |
| Break Room | A safe room with no enemies. You can chat with other penguins, and also visit the Jester’s shop and use the exit portal. |

Break Room

Maze Room

Battle Room | Throw elements at the enemies to defeat them.
Outdoor Hazards
- Ice spikes rise and drop quickly, so time your crossing.
- Fire bars spin around a central block with anywhere from 2 to 10 fireballs, so stay close to the middle to avoid the tips.
- Water orbs bounce slowly around the screen, but they can sneak up on you.

Water Orbs

Fire Bars

Ice Spikes
Finding Secret Rooms
Secret rooms are well hidden. First, look for mouse holes, grey windows or crawl spaces at the bottom of walls. The 3D Glasses artifact also makes them easier to spot as it highlights the secret entrances in orange. If you can’t find an exit in a room, try walking along the walls, as an entrance is often nearby.


All 10 Notes
Once you’re inside a secret room, look for a glowing purple note and stand on it to pick it up. Then you’ll find it in your notebook, which is the parchment icon in the top right corner. Here are all ten titles, but spoilers ahead, so read at your own risk!
- Gazing Stars
- A Dream
- Magic and Machines
- Friends
- Spirits
- Setbacks
- Mysteries
- Limitations
- Distancing
- No End

An example of one of the ten notes needed to face Garriana
Enemies and Elements
There are three types of elemental spirit: fire, water and snow. Each has 20 HP, but they follow a simple cycle: water beats fire, fire beats snow and snow beats water. Use the right element and you’ll deal 10 damage, but the same element deals 5, and the wrong one only deals 2.
- Fire spirits: Water deals 10 damage, but fire only deals 5, and snow deals just 2.
- Water spirits: Snow deals 10 damage, but water only deals 5, and fire deals just 2.
- Snow spirits: Fire deals 10 damage, but snow only deals 5, and water deals just 2.

The spirits attack from range too. Fire spirits throw small, quick fireballs, water spirits send out medium, slower orbs, and snow spirits throw large snowballs at a medium speed. Enemies also hurt you if you touch them, and in Battle Rooms they come in waves. You can meet spirits in every room type except Secret Rooms and Break Rooms, so even the outdoor floors aren’t completely safe.
Club Penguin Journey Infinite Tower Guide: Artifacts and the Jester’s Shop
Artifacts are what turn a short climb into a long one. They come in three types: weapons attack enemies up close or from range, equipment gives you an extra shield plus passive perks, and support items give a temporary buff, but then need a few floors to recharge. You can find them in chests in Battle, Outdoor and Secret Rooms, but you can also buy them from the Jester in the Break Room using your treasure.
How the Jester’s Shop Works
You’ll reach the Break Room after climbing a few floors, but nobody is sure of the exact number, so keep climbing and you’ll get there. Once you’re inside, click the Jester at the stall in the top left of the room, then click Buy. Three chests will appear, and the colour shows how rare the item inside is while the icon shows its type: sword for weapons, shirt for equipment, potion for support and hanger for clothing. One of the three chests is always an uncommon clothing chest, and that stays until you own every clothing item. After that, all chests are fully random.
Once you click a chest, your item will rise out of it. Then you either can buy it, and it goes straight into your inventory, or you can click No and it returns to its chest. After that, choose whether to stay or leave using the Exit option or the (X) in the top left of the screen.

Chest Rarities and Prices
Each chest colour matches a rarity and a fixed price, so here are a few examples from each tier.
- Common (brown box, 150 treasure): Anvil Hammer, Sword, Beta Spear, Box Plate Armor, Viking Helmet, Haste Potion, Foundation Shield, Ye Puffle O’s. This is the cheapest tier, so it’s a good place to start.
- Uncommon (green box, 300 treasure): Ye Hot Cannon, Sir Fluffy, Magic Snow Shovel, 3D Glasses, Duck Floatie, Ice Cream Apron, Patty’s Hat, Welding Mask, Hard Hat, Resistance Potion. This tier costs double the Common price, but it includes several shield items, such as the Hard Hat and Duck Floatie.
- Rare (purple box, 475 treasure): Jackhammer, Black Belt, Jetpack, Life Ring, Safety Vest, Infinite Pizza, Pufflescape Ball, Tiger Cave Toga. You’ll need to save up for these, because each one costs 475.
- Legendary (red box, 750 treasure): A Cactus, Ninja Mask, Wizard Hat, Mega Dragon Potion. Since they’re the rarest items, they’re also the priciest.
The full price list is further down, but remember that more items may be added later. Overall, the whole shop costs 35,825 treasure in total, which is 3,000 for the Brown chests, 20,450 for the Green, 7,125 for the Purple and 5,250 for the Red. Chests you find in the tower itself have different odds, though, at roughly 40% Common, 30% Uncommon, 20% Rare and 10% Legendary.
Full Jester’s Shop Price List
Next, here’s every chest in the shop, grouped by rarity, so you can see what each price gets you.
Common Chests (Brown)
- Weapons (150 each): Anvil Hammer, Beta Spear (Normal, Fire, Snow and Water), Sword (Normal, Fire, Snow and Water).
- Equipment (150 each): Box Plate (Normal, Fire, Snow and Water), Viking Helmet (Normal, Fire, Snow and Water), Ye Puffle O’s.
- Support (150 each): Foundation Shield, Haste Potion.
Uncommon Chests (Green)
- Weapons (300 each): Magic Snow Shovel, Sir Fluffy, Ye Hot Cannon.
- Equipment (300 each): 3D Glasses, Duck Floatie, Hard Hat (Normal, Fire, Snow and Water), Ice Cream Apron, Patty’s Hat, Welding Mask.
- Support (300 each): Flame in a Bottle, Resistance Potion, Snow Potion, Water Potion.
- Clothing (250): Black Noble Steed, Bow and Arrows, Chestnut Noble Steed, Dark Brown Noble Steed, Emerald Wizard Hat, Emerald Wizard Robe, Magic Potion, Magical Book, White Noble Steed.
- Apprentice Hat (300): This is the only clothing item at that price.
- Clothing (350): Blue Hydra Feet, Dragon Wing Helmet, Emerald Staff, Magical Wand, Red Hydra Feet, Rogue’s Rapier, Scorn Crown, Staff of Wonder, Wizardly Jacket.
- Mid-priced clothing (550): Blue Hydra Costume, Dragon King Feet, Enchanted Wings, Magic Staff, Red Hydra Costume, Rogue’s Cloak, Rogue’s Tunic, Scorn Robe, Wizardly Hat.
- Top-priced clothing (1,000): Dragon King Costume, Dragon Pet, Medieval Cloak, Scorn the Dragon Pet, Sword of Virtue.
Rare Chests (Purple)
- Weapons (475 each): Jackhammer (Normal, Fire, Snow and Water).
- Equipment (475 each): Black Belt, Fire Blossom, Jetpack, Life Ring, Pufflescape Ball, Safety Vest, Snow Rose, Tiger Cave Toga, Water Lotus.
- Support (475 each): Infinite Pizza, Magic O’Berry.
Legendary Chests (Red)
- Weapons (750 each): A Cactus.
- Equipment (750 each): Ninja Mask, Wizard Hat (Normal, Fire, Snow and Water).
- Support (750 each): Mega Dragon Potion.

This is your backpack, where artifacts you choose to keep are stored
Best Artifacts to Look For
- Welding Mask (Uncommon): Gives +1 shield and +10% fire damage. A favourite for the boss fight.
- Ice Cream Apron (Uncommon): Gives +1 shield and regenerates your health on every floor.
- Hard Hat (Uncommon): Gives +2 shields.
- Duck Floatie (Uncommon): Gives +1 shield and bounces very close enemies away from you.
- Patty’s Hat (Uncommon): Gives +1 shield and better odds of finding Uncommon or better artifacts.
- Jetpack (Rare): Gives +20% speed and +10% damage, and you can survive one fall.
- Life Ring (Rare): Gives +3 shields the first time you lose health on each floor.
- Safety Vest (Rare): Your weapons deal extra damage equal to your shields.
- Infinite Pizza (Rare): Heals you a little, but slows you down by 10%.
- Resistance Potion (Uncommon): Gives +4 shields.
If you’d rather not spend your treasure, you can also take a chance on chests in the tower. Just remember that you can only hold 4 artifacts at once.

Weapon Stats
Weapons are how you deal big damage, but each one works a little differently. Some hit up close, while others are ranged, so pick the one that suits how you play. Here’s how they compare:
| Weapon | Damage | Cooldown | Extras |
|---|---|---|---|
| Sword (Common) | 10 | 3 seconds | Normal is the neutral version, and the Fire, Water and Snow versions deal that element instead. |
| Beta Spear (Common) | 8 | 1.5 seconds | Pushes any enemy it hits to the end of its range. |
| Anvil Hammer (Common) | 20 | 8 seconds | Slow, but it stuns the enemy and anything nearby for 4 seconds. |
| Ye Hot Cannon (Uncommon) | 3 per second for 5 seconds | 10 seconds | A ranged fire weapon, so it’s great for enemies you can’t reach. |
| Sir Fluffy (Uncommon) | 10 | 1 second | Deals water damage, and it’s also the fastest weapon in the tower. |
| Magic Snow Shovel (Uncommon) | 12 | 4 seconds | A ranged snow weapon. It’s the one weapon you can’t take out of the tower as an item. |
| Jackhammer (Rare) | 4 | 2 seconds | Has a 50% chance to stun nearby enemies. It comes in Normal, Fire, Water and Snow. |
| A Cactus (Legendary) | 8 | 3 seconds | It’s a cactus, but it still hits just as hard as a sword. |
If you leave the tower safely, you can keep most weapons as items. The only exception is the Magic Snow Shovel.
Full Artifact List
Here’s every equipment and support artifact. Equipment gives you a shield and some perks, and you’ll see it on your penguin when you wear it, but you can’t keep it as an item. Support items give a short buff, then need a few floors before you can use them again.
Common and Uncommon Equipment
- Box Plate (Common): Gives +1 shield. It also comes in Normal, Fire, Water and Snow.
- Viking Helmet (Common): Gives +1 shield, and enemies take 1 damage when they hit you. You can only wear one, and players report that it actually gives 2 shields.
- Ye Puffle O’s (Common): Your puffle earns XP for each floor you finish and can dig up treasure, items or artifacts over time.
- 3D Glasses (Uncommon): Highlights secret rooms, so they’re easier to spot.
- Patty’s Hat (Uncommon): Gives +1 shield and some luck: you’re 5% more likely to find Uncommon or better artifacts and 15% less likely to find Common ones. You can only wear one.
- Welding Mask (Uncommon): Gives +1 shield and adds 10% power to the fire damage you deal.
- Duck Floatie (Uncommon): Gives +1 shield, and very close enemies also bounce back.
- Ice Cream Apron (Uncommon): Gives +1 shield. Some sources also report that it regenerates your health on every floor.
- Hard Hat (Uncommon): Gives +2 shields. It also comes in Normal, Fire, Water and Snow.
Rare and Legendary Equipment
- Safety Vest (Rare): Your weapons deal extra damage equal to your number of shields, so the more you have, the harder you hit.
- Jetpack (Rare): Gives +20% movement speed and 10% more damage, and you can survive falling off once.
- Black Belt (Rare): Attacks that win on type deal 50% more damage, so pick your elements wisely.
- Fire Blossom (Rare): Your weapons also deal an extra 20% damage as Fire.
- Water Lotus (Rare): Your weapons also deal an extra 20% damage as Water.
- Snow Rose (Rare): Your weapons also deal an extra 20% damage as Snow.
- Tiger Cave Toga (Rare): Removes all your shields, but you deal 50% more damage, plus 1% for every HP you’ve lost on the current floor.
- Life Ring (Rare): Gives +3 shields the first time you lose health on each floor.
- Pufflescape Ball (Rare): Gives +1 shield, and you move 10% faster each time you take damage.
- Ninja Mask (Legendary): Enemies on the floor only notice you when you attack or get really close, so you can sneak past them.
- Wizard Hat (Legendary): Gives +1 shield and cuts the cooldown on your support artifacts by 1 floor. It also comes in Normal, Fire, Water and Snow.
Support Artifacts
- Foundation Shield (Common): Makes you invulnerable for 2 seconds, then recharges in 15 seconds.
- Haste Potion (Common): Gives +40% movement speed and can save you from falling once, but it needs 2 floors to recharge.
- Resistance Potion (Uncommon): Gives +4 shields, then needs 3 floors to recharge.
- Flame in a Bottle (Uncommon): Turns you into Fire type until you change floors, and fire weapons deal 40% more damage. It needs 2 floors to recharge.
- Water Potion (Uncommon): Turns you into Water type until you change floors, and water weapons deal 40% more damage. It needs 2 floors to recharge.
- Snow Potion (Uncommon): Turns you into Snow type until you change floors, and snow weapons deal 40% more damage. It needs 2 floors to recharge.
- Infinite Pizza (Rare): Recharges in just 1 floor, but you move 10% slower. Players say each bite heals around 8% of your health.
- Magic O’Berry (Rare): Makes your puffle dig for treasure, items or artifacts when you use it, then needs 6 floors to recharge. Leave the tower with it and you’ll also get a Magic O’Berry, which levels up your walked puffle.
- Mega Dragon Potion (Legendary): Gives +3 shields and turns you into a Mega Dragon for one floor, so you can’t fall. It needs 10 floors to recharge.
Leaving the Tower
There are two ways to leave, but the difference matters:
- Exit portal or launch pad (Break Room): This is the safe way out. You keep all of your treasure, and you also get a chance to keep certain artifacts as items.
- Surrender flag or defeat: You can use the flag at any time, and the same thing happens if you’re defeated. You only get back 30 to 70% of your treasure, you don’t keep any artifacts, and your next run starts on a lower floor.
The weapons you can take out of the tower as wearable items are the Anvil Hammer, Swords, Beta Spears, Jackhammers, Ye Hot Cannon, Sir Fluffy and A Cactus. So whenever you can, aim for the exit portal!

Club Penguin Journey Infinite Tower Guide: Garianna Boss Fight
At the heart of the tower is its secret boss, Garianna, the Witch of the Five Kingdoms. There’s no height you need to reach to face her, but you do need to collect all 10 notes. There’s one in each secret room, and you can also track them in your notebook in the top corner of your screen.
Once you have all 10, the next secret room you enter should be the mirror room. Click the mirror to play a short cutscene, and then take the door on your left to begin the fight. After it begins, you can’t go back to the tower, so stock up first. Get your elemental throws up to 10 of each, then take ranged attacks along with your best shields.

Phase 1: The Waves
Speak with Garianna first, and after a bit of dialogue, the first wave begins. She can’t be hurt yet, so don’t waste anything on her. Instead, defeat 3 waves of enemies while you dodge her fireballs, which come in a spread of three. Keep moving, then let your shields do the work. After each wave, she runs further upstairs. Once the waves are done, walk along the top of the wall to reach the next room, because the stairs in the middle are either bugged or magical!

Phase 2: The Chase
Now it’s a race! Follow Garianna through four rooms in total by walking along the platforms, while you avoid the obstacles. She doesn’t attack in this part, but the hazards still do, so save your shields for the spikes, fire bars and water orbs. In the fourth room, talk to her one last time, and then follow her up the stairs for the final wave.

Phase 3: The Final Fight
Garianna will fly back and forth, throwing projectiles, but she will land from time to time. Simply stay back and throw your elements ahead of her path so she can fly straight into them. Her health bar is on the left side of your screen, so you can keep track of your progress. The element doesn’t seem to matter, so feel free to throw all of them, because your supplies get topped up during the fight. So when she lands, that’s your chance to strike. Your weapons only work while she’s on the ground. Bring her health down to zero, then climb the ladder after her for the final cutscene!


Best Boss Gear
- Welding Mask for extra damage.
- Ice Cream Apron or Infinite Pizza for healing.
- Jetpack for speed and protection from falls.
- Hard Hat, Life Ring or Safety Vest for extra shields.
- Duck Floatie to keep enemies off you in Phase 1.
Once you beat Garianna, you’ll leave the tower with your treasure and any artifacts you can keep, plus a free background signed by Garianna and the Jester.
Rewards
- Tower Champion Armor: Every run earns experience, so each new level gives you a piece of Infinite Tower clothing. The pieces unlock in this order: Cloud Striders, Pillars’ Heart Guard, Wind Fists, Sky Mantle and Watchtower Helm. Once you collect the full set, you can do a special dance by pressing D.

- Jester’s Clothing: The Jester’s first box is always clothing, and there are over 30 wizard, dragon and hydra-themed items to buy, costing anywhere from 250 to 1,000 treasure. The priciest, though, include the Medieval Cloak, Dragon King Costume, Dragon Pet and Sword of Virtue.
- Weapon Clothing: Exit safely with certain weapons and you can wear them afterwards.
- Boss background: Beat Garianna for the Jester’s Giveaway background.

Club Penguin Journey Infinite Tower Guide: Tips and Tricks
These tips are grouped by what they help with, so jump to the ones you need.
Fighting Smart
- Match the element. Hot sauce for snow spirits, water balloons for fire spirits and snowballs for water spirits.
- Alternate your shots. If you run out of ammo and there are two types of enemy, shoot one element and then the other. Each element regenerates on its own cooldown, so you’ll get ammo back faster.
- Aim for groups. Your throws sometimes cause splash damage, so aim between two close enemies to hit both. So fewer shots means you can reach the next room sooner.
- Plan your swings. Weapon cooldowns keep ticking while your backpack is open, so you can check your gear and get ready for your next attack while the game is paused.
- Skip pointless fights. Enemies in Maze Rooms and outdoor spike rooms don’t give rewards, so just avoid them and keep climbing.
Rooms and Routes
- Watch the trapdoors. A wobbling trapdoor means you’re about to lose 10 metres, so move quickly.
- Find the shortest route. In maze rooms, get out as fast as you can by picking the path with the fewest barriers. Trapdoors also trigger less on early floors, so you can often run straight through.
- Choose your rooms. Outdoor rooms are best if you want treasure or a high score, but indoor rooms are better if you’re hunting for artifacts.
- Going for treasure? Wear Patty’s Hat and the Duck Floatie, while avoiding fights and staying on the outdoor floors.
- Use Break Rooms wisely. They’re your chance to spend treasure, and then leave through the portal with everything you’ve earned.
Gear and Backpack
- Stack your shields. The more shields you have, the less often you’ll lose health. Support items, hats and potions all add them, so keep an eye out for them.
- Always drag artifacts into empty slots. That way you won’t accidentally lose a good one, because dropping one onto a full slot replaces the old item.
- Check your penguin. If an artifact doesn’t show on your penguin, try rearranging your backpack. Some body equipment can also cancel each other out.
- Swap your gear. You can unequip equipment by moving it to another backpack slot, and then equip it again with its number key. That lets you switch between items you can’t wear together, such as the Hard Hat and Patty’s Hat. But the shields from an item disappear when you take it off.
- Keep items off the chest tile. If you drag an item onto an open chest’s tile, it can overwrite what’s inside, so the original artifact may become impossible to get.
Player-Tested Best Items
These picks come from players who’ve done lots of runs, so treat them as opinions rather than official facts. Their numbers also differ a little from the artifact table above, so check each item’s stats in your backpack.
- Welding Mask: Players call it the best item in the game, because its damage is said to grow by one in every room you clear. One player says it lets a snowball one-shot anything later in a run, so it may get nerfed.
- Infinite Pizza: It doesn’t sound great, but it’s a handy healer. Players say each bite heals around 8% of your health, but the slowdown isn’t a big deal.
- Duck Floatie: It pushes enemies away as you walk past, so you can speed through rooms without taking damage. It also pairs well with the Welding Mask.
- Life Ring: One player says it gives around 4 to 5 shields by itself, so it’s a great partner for the Welding Mask.
Also, one favourite build is the Welding Mask along with three items that give shields.
Known Glitches
Infinite Tower is a big game, so a few players have reported bugs. Here’s what to watch for:
- No exit: If a room seems to have no way out, walk along the walls until the next room loads. After the boss’s mirror breaks, check the upper-right corner of the room for a hidden exit if the stairs won’t work.
- Frozen ending: The final cutscene may freeze on its last frame. Stay on the page and wait, because it can take several minutes. Don’t worry though, you’ll be moved to the Snow Forts and the background will be added to your inventory.
- Ladder bug: The boss battle is also reported to be bugged. After you climb the ladder, there’s a high chance of spawning back in the Snow Forts, so proceed at your own risk!
- Magic O’Berry: One player reported that it wasn’t working properly, so watch out and you may want to save your treasure!
⭐ Our Infinite Tower Rating
So, is Infinite Tower worth the climb? It’s a deep, surprising game with a bit of everything, from puzzles and fights to loot and a secret boss, and no two climbs are quite the same. Read below for my review.
🎮 Gameplay: 3/5
🔁 Replayability: 3/5
🎁 Rewards: 5/5
🔥 Difficulty: 4/5
Overall Rating: 3.75/5 ⭐
These are our own ratings, not an official Club Penguin Journey score.
Our Verdict
Infinite Tower is one of the most ambitious games in Club Penguin Journey. However, if I’m being honest, I don’t enjoy it. There’s too much going on and it’s too clunky for me to enjoy. I’m sure many people love this game and I do love the rewards you can get from it but you’ve got to really dedicate time to it. With that being said though, there’s plenty to learn, from elemental matchups to artifact builds, and the hunt for those 10 notes and a showdown with Garianna gives you a real goal to aim for. With this Club Penguin Journey Infinite Tower guide in hand, pick your artifacts wisely, aim for the exit portal and good luck, penguins!
📚 More Guides
Looking for more Club Penguin Journey guides? Check out these pages for hidden items, catalog secrets, party information and mini-game walkthroughs!

Misc. Catalogs and Guides
Explore more catalogs, hidden clothing items, furniture secrets and other useful Club Penguin Journey guides.

Mini-Game Guides
Need help earning stamps or collecting coins? Browse our mini-game walkthroughs for tips, strategies and stamp guides.

October Penguin Style Secrets
Discover hidden clothing items and secret catalog cheats in the October 2026 Penguin Style Catalog with our complete guide.
Thanks for Reading this Club Penguin Journey Infinite Tower Guide!
That’s everything you need to take on Infinite Tower in Club Penguin Journey! From your first nervous steps through the Maze Room to a showdown with Garianna, we hope this Club Penguin Journey Infinite Tower guide helps you climb higher than ever. What is your favourite Club Penguin Journey game? Let us know in the comments below!
If you’d like more Club Penguin Journey guides, stamp guides and catalog secrets, make sure to join our Discord!
Kyle
Filed under: Club Penguin Journey, Dark Warriors, Mini-Game Guides | Tagged: A Witch’s Tale, Artifacts, Boss Fight, Elemental Spirits, Garianna, Infinite Tower, Jester’s Shop, Maze Rooms, Medieval Party, Secret Notes, Secret Rooms, Tower Champion Armor, Treasure, Walkthrough, Weapons |


woooo best and most detailed guide! cant wait to use this information to explore the game fully
I thought only Geometry Dash had a tower 🤔. Well it ain’t infinite so this one’s better
firee
wtfreak, never even knew this game exister o.O cool stuff
kyle my goat
omg i been lost there for ages IM FREEE FROM TTHE INFINITE TOWER PRISON WOOOOOO!
Infinity train( also I made the pic)